Introduction
In the realm of architectural design, marker rendering emerges as an essential technique, bridging the gap between abstract concepts and tangible visualizations. This method not only enhances the aesthetic appeal of floor plans but also serves as a crucial tool for architects to communicate their design intentions with clarity and precision. By skillfully incorporating markers, architects can create renderings that convey depth, texture, and dimension, transforming static drawings into engaging representations that resonate with clients and stakeholders alike.
As the industry increasingly embraces advancements in rendering technology, understanding the intricacies of marker rendering becomes imperative. This article delves into the fundamental principles, essential tools, and innovative techniques that can elevate architectural visualizations, ensuring they not only capture the imagination but also reflect the highest standards of professional practice.
Introduction to Marker Rendering in Architectural Design
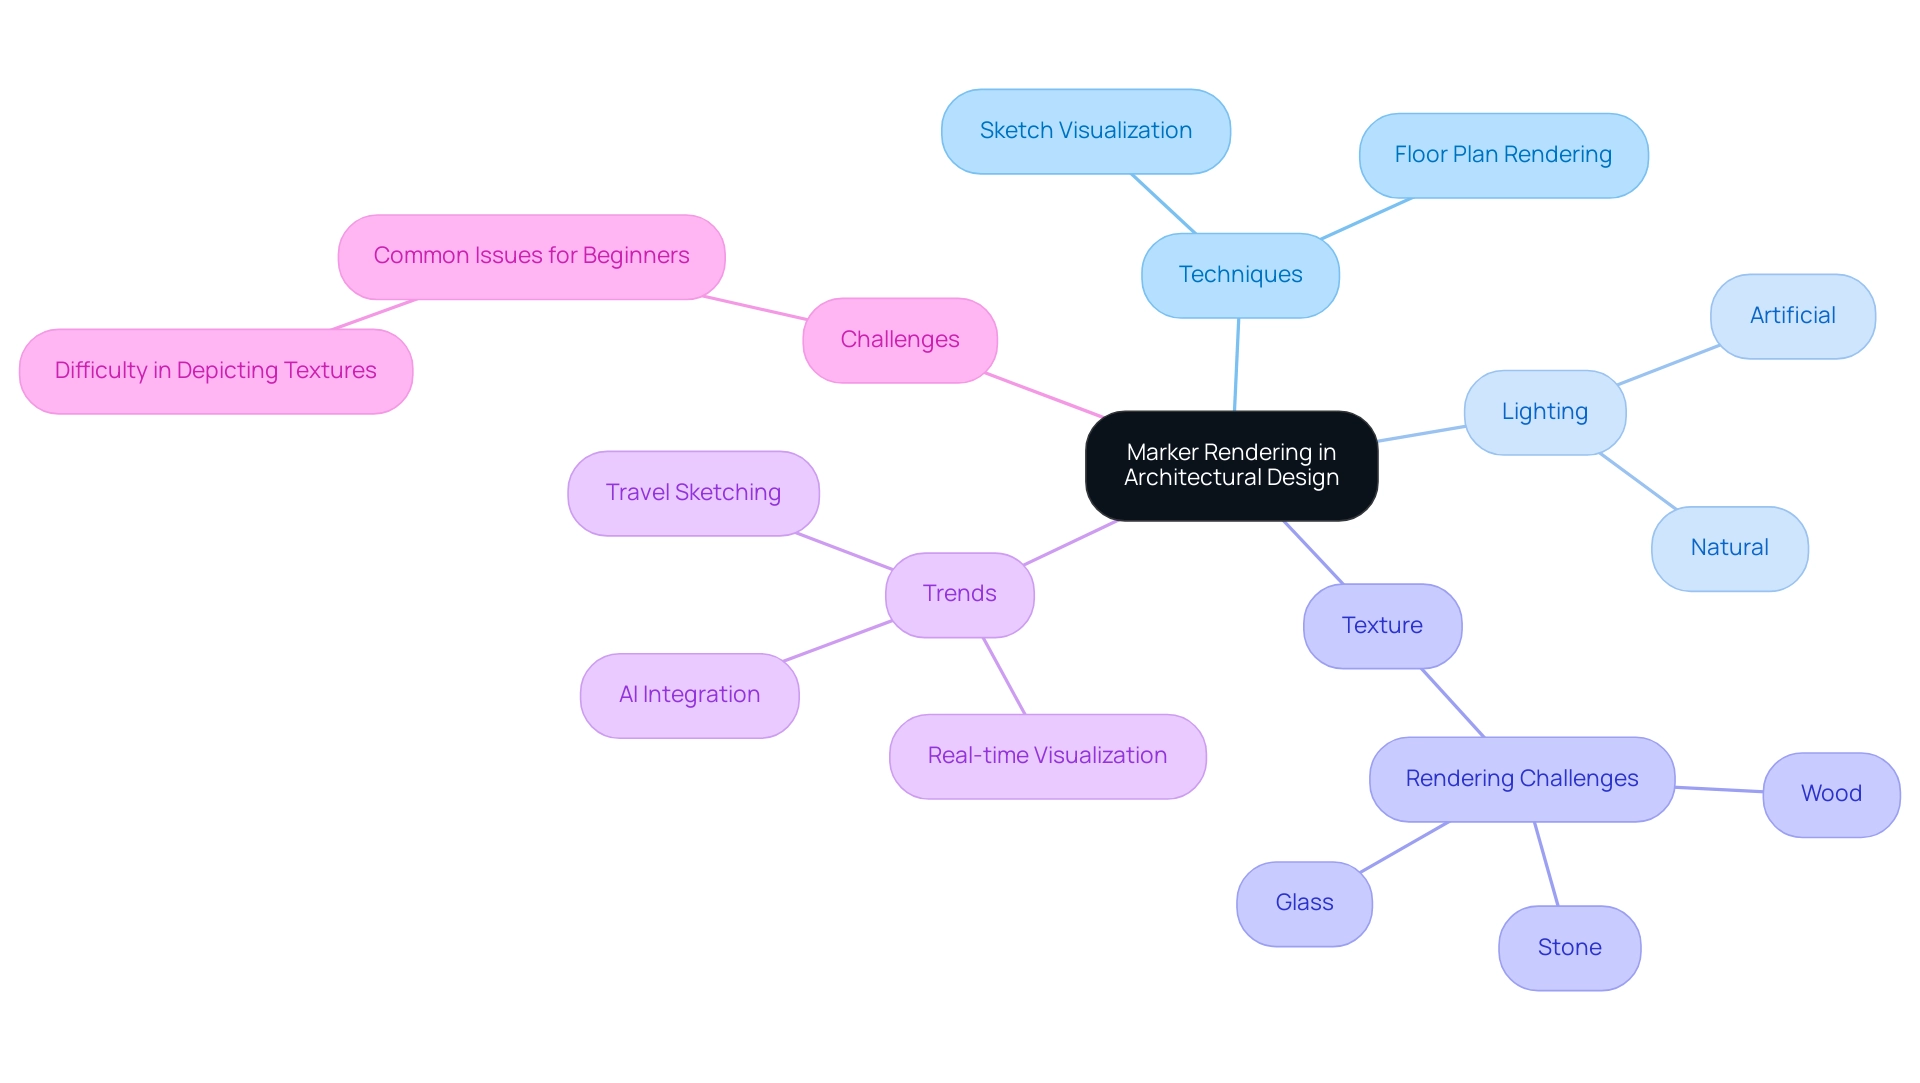
Marker illustration serves as a crucial method in architectural creation, allowing for the production of visually captivating representations using floor plan architectural rendering markers. This approach utilizes tools to enhance drawings, effectively conveying depth, texture, and dimension. By mastering the principles of marker visualization, architects can express their concepts with precision to clients and stakeholders.
Notably, the role of lighting in these visuals cannot be overstated; artificial lighting in interiors must harmonize with natural sunlight in exteriors to achieve realism and authenticity in design. For instance, the way artificial light interacts with materials such as glass can create reflections that enhance the perceived depth of a space, while the texture of fabric can absorb or diffuse light, affecting the overall ambiance. The recent Sketching Retreat 2023, a six-day online event featuring over 30 workshops, exemplifies the growing interest in this technique, as it offers participants invaluable insights from experienced instructors on effective illustration practices.
As mentioned by Olga Sorokina, a specialist in the area, ‘A common issue for novices in sketching is experiencing difficulty in depicting textures (especially wood, glass, and stone).’ This underscores the necessity for architects to enhance their abilities in illustration, particularly in emphasizing texture and durability within their floor plan architectural rendering markers. Furthermore, the rise of real-time visualization and AI is reshaping architectural representation, suggesting a significant shift in industry standards.
According to recent statistics, over 70% of architects now include sketch visualization methods in their design processes, reflecting their increasing significance. Furthermore, while travel sketching has surfaced as a way to swiftly express the atmosphere and mood of a location, it is crucial to concentrate on how these visual representation methods directly improve architectural depiction. This guide will explore essential tools and techniques, discuss the latest trends in visual representation, and identify common pitfalls to avoid, ensuring that your visuals are both visually stunning and accurate reflections of your architectural vision while enhancing project confidence and supporting investment through effective pre-sales visualization.
Essential Tools and Materials for Marker Rendering
To achieve exceptional presentations of floor plans, the use of floor plan architectural rendering markers along with a selection of specialized tools and materials is paramount, reflecting an investment in quality that is crucial for effective architectural visualizations.
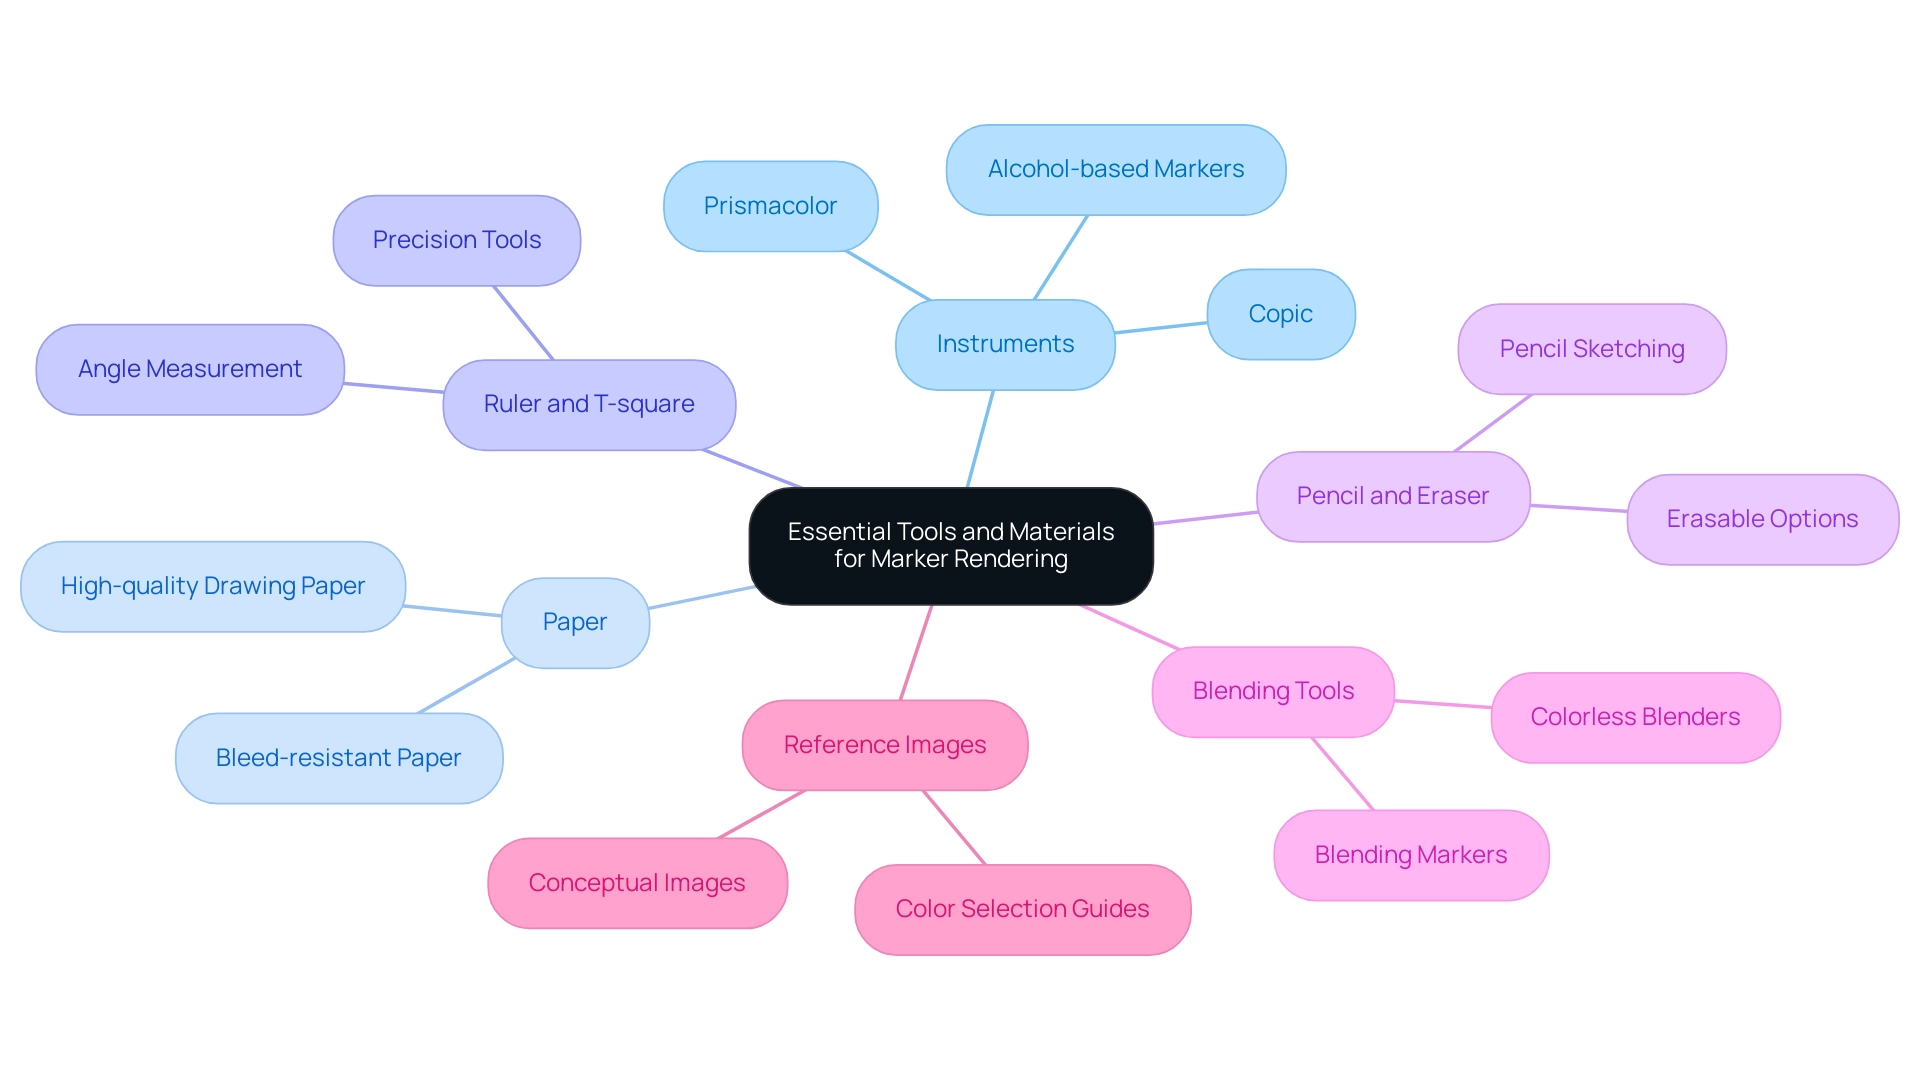
- Instruments: Prioritize high-quality alcohol-based instruments, renowned for their vibrancy and seamless application. Leading brands such as Copic and Prismacolor are often favored by professionals for their reliability and color range.
As noted by Olga Sorokina,
If you are looking for your first and relatively affordable set, I would have started with them.
These pens not only improve the visual attractiveness but also assist in communicating the creative intent distinctly.
- Paper: Choose bleed-resistant paper meant to endure ink application without permitting bleed-through, ensuring clean and sharp outputs. This attention to detail supports the clarity needed for informed decision-making and helps stakeholders visualize the project more effectively.
- Ruler and T-square: These tools are indispensable for achieving precise lines and angles, which are crucial for professional-grade architectural drawings and enhancing overall project visualization. Their application guarantees that the visuals, enhanced with floor plan architectural rendering markers, correctly convey the architectural vision, generating enthusiasm about the project.
- Pencil and Eraser: Start your creations with a pencil sketch to ensure precise placements before moving to pens, permitting modifications as necessary. This flexibility demonstrates the significance of personalization in visual projects, allowing architects to enhance their vision based on feedback.
- Blending Tools: Incorporate blending markers or colorless blenders to create smooth transitions between colors, enhancing the overall aesthetic of your visuals, which can impress stakeholders and facilitate better project outcomes by presenting a polished vision.
- Reference Images: Gather reference images that resonate with your concept vision, guiding your color selection and visualization techniques. This practice aligns with market dynamics and emerging aesthetic preferences, ensuring that the final product meets contemporary expectations.
In the current architectural landscape, understanding market dynamics is crucial. For instance, AECOM fees stand at 13.6, reflecting the financial context architects must navigate. By investing in quality floor plan architectural rendering markers, architects can justify their costs and enhance the perceived value of their projects.
Additionally, the senior living segment generated fees of 32.0 in 2023, with a forecasted decrease to 22.4 in 2024, indicating shifting priorities and project availability. By utilizing these tools effectively, architects can significantly enhance their visualization processes, aligning with current trends and market dynamics within the architecture and interior sectors. Insights into consumer behavior, such as emerging style preferences and project demands, further emphasize the significance of these tools in adjusting to an evolving market.
Step-by-Step Guide to Creating Floor Plan Renderings
To create an engaging floor plan visualization that captures the essence of your concept, follow this structured approach:
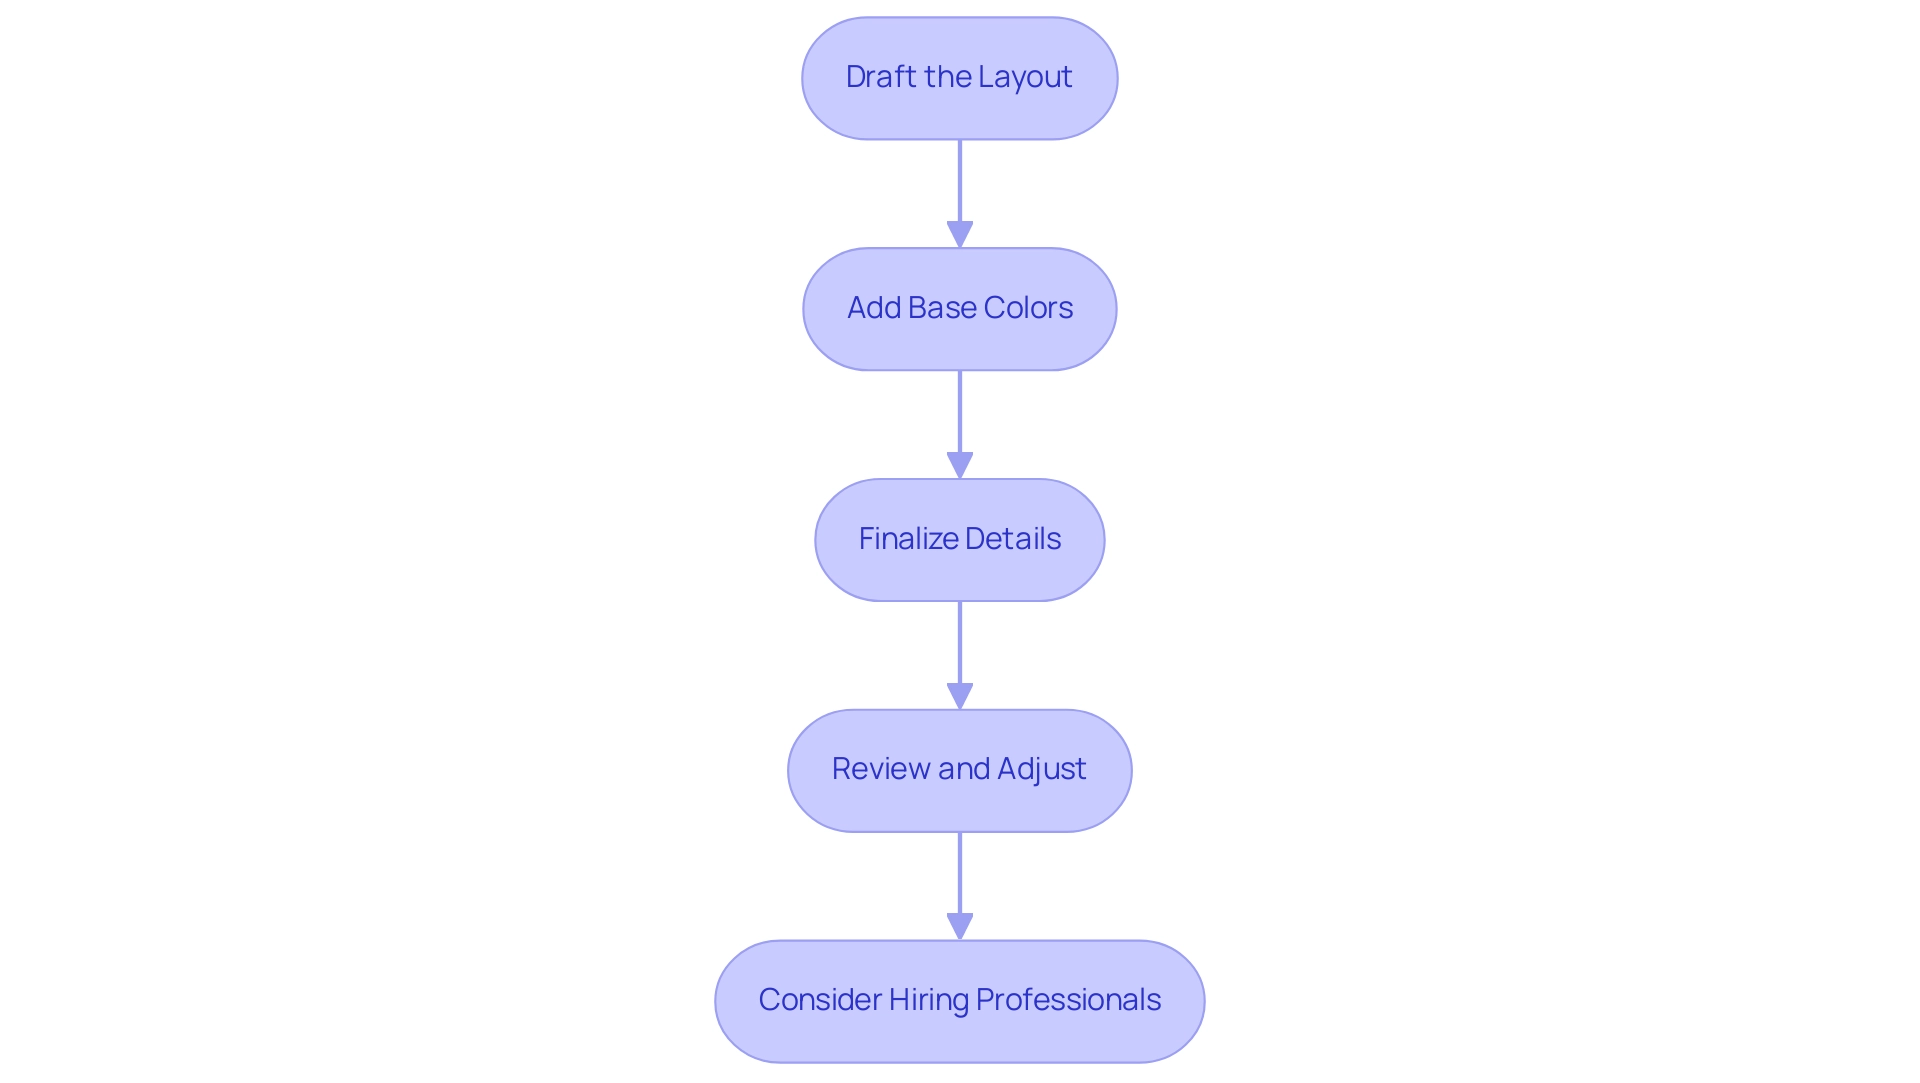
- Draft the Layout: Begin with a pencil sketch of your floor plan, meticulously marking the walls, doors, and windows to ensure accuracy. This initial step is crucial for establishing a solid foundation for your floor plan architectural rendering markers, as precision is paramount in conveying the intended essence.
Outline with Floor Plan Architectural Rendering Markers: Use floor plan architectural rendering markers to clearly outline your pencil sketch, ensuring that the lines are well-defined. Allow the ink to dry thoroughly before erasing the pencil marks to prevent smudging and maintain clarity, which is vital for effective client communication.
Add Base Colors: Utilize broad strokes to fill in major areas such as walls and floors with base colors. Select a color palette that complements the design of the floor plan architectural rendering markers while reflecting the intended mood and functionality of the space, enhancing the overall visual appeal.
Layering Colors: Enhance the rendering by applying additional layers of color. This method adds depth and dimension; employ lighter shades for highlights and darker shades for shadows, contributing to a more dynamic visual representation that can significantly impact property value through its market differentiation.
Finalize Details: Incorporate finer details, including furniture, fixtures, and textures. Utilize blending techniques to create smooth transitions between colors, significantly enhancing realism and visual impact, which are crucial in floor plan architectural rendering markers for residential architecture designs.
Review and Adjust: After finishing your creation, take a moment to step back and assess your work. Make necessary adjustments to colors and details, ensuring that the final output aligns with your design vision and meets professional standards. Client collaboration during this phase can lead to valuable insights that improve the quality of the output.
Consider Hiring Professionals: If you find these steps overwhelming or lack the necessary software skills, consider hiring expert 3D architectural visualization services. Look for providers with a strong portfolio, positive client reviews, and a clear understanding of your vision. Working with specialists can enhance your project and guarantee top-notch outcomes that appeal to prospective customers.
In a competitive market with an estimated 607,000 architecture-related firms globally, mastering these rendering skills is crucial for architects. With private housing representing 53% of the architectural market, effective visualization of concepts becomes even more critical for communicating ideas to clients and stakeholders. By integrating these methods and considering professional assistance, architects can significantly improve their design visualizations, thereby enhancing their competitive edge in the industry.
Techniques for Adding Textures and Details
To enhance the realism of your architectural renderings, employing effective texture and detailing methods alongside floor plan architectural rendering markers is crucial. Here are several approaches to consider:
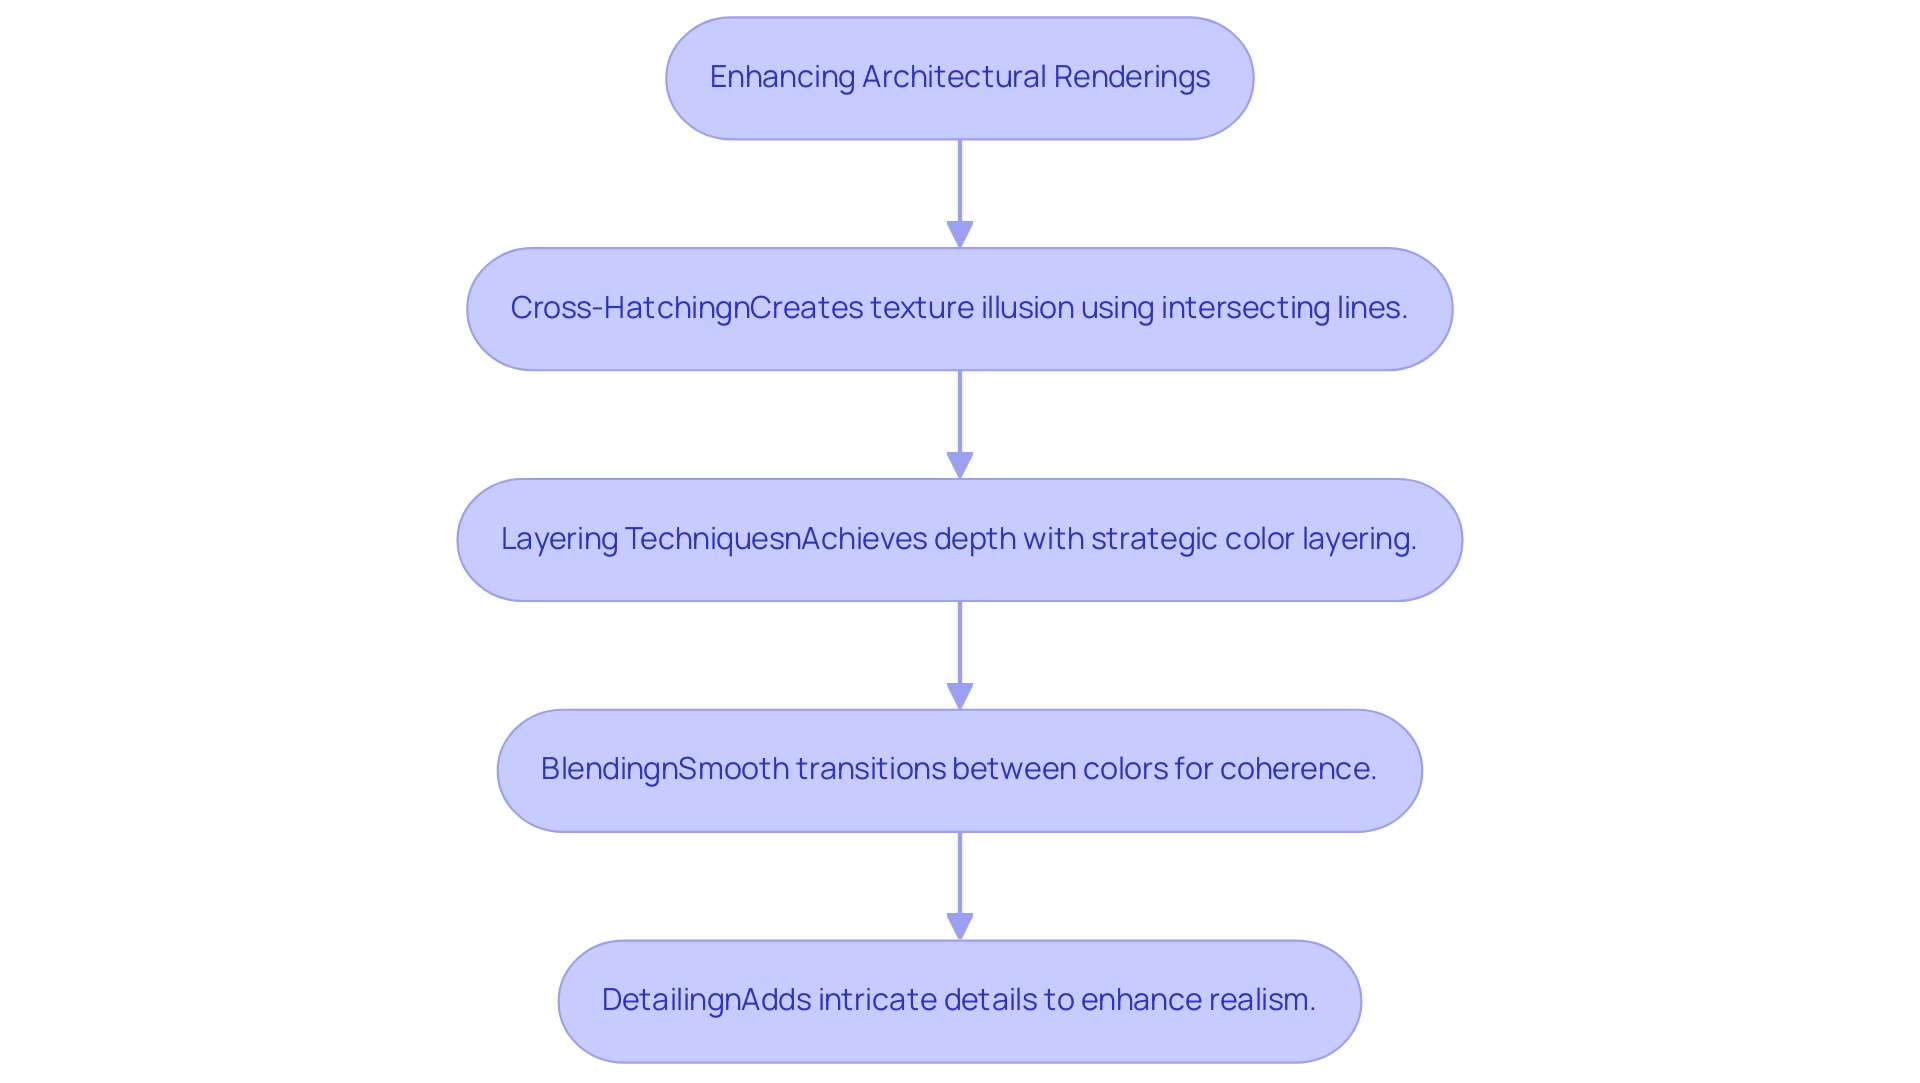
- Cross-Hatching: This technique involves creating the illusion of texture on various surfaces, such as brick or wood, through the use of intersecting lines. By varying the density and direction of these lines, you can effectively depict the unique characteristics of different materials, thus determining the appropriate level of detail for your project using floor plan architectural rendering markers, whether it’s for a homeowner looking for a cozy feel or a business aiming for a sleek corporate look.
This method consists of placing small dots to simulate shadows or the roughness of surfaces, allowing for a nuanced portrayal of texture that enhances the emotional impact of your designs. For instance, homeowners may appreciate the warmth of a textured wall, while businesses might prefer a more polished appearance.
Layering Techniques: Depth in visuals can be achieved through strategic layering of colors and shades. Utilize lighter hues for highlights and darker tones to indicate shadows, creating a more dynamic and three-dimensional appearance that reflects the project’s complexity and scale. Tailoring these layers within the floor plan architectural rendering markers can help convey different atmospheres to various stakeholders.
Blending: Incorporate a colorless blending tool to seamlessly transition between colors, particularly in areas where a gradient effect is desired. This technique smooths out color variations, enhancing the overall visual coherence of the image, which is essential for effective client assessment and creative experimentation. For business clients, a clean gradient might convey professionalism, while a more varied palette could appeal to residential projects.
Detailing: Once the primary visualization is completed, revisit your work with a fine-tip marker to add intricate details. Elements such as window frames, door handles, and other architectural features can significantly enrich the visual impact of your creation, making it feel real and ready to be built. Clients frequently engage emotionally with these details, which can influence their choices.
By mastering these methods, you can enhance the quality of your architectural renderings, including floor plan architectural rendering markers, ensuring they effectively convey your design vision to various audiences. Additionally, to further enhance your skills, consider enrolling in the highly recommended course ‘Materials and Texture in Architectural Design’ available on Coursera, led by experts from MIT. Moreover, the practical implementation of texture methods is illustrated in the case study ‘Texture Analysis for Historical Preservation,’ which shows how texture analysis contributes to safeguarding historical architecture.
As you explore these techniques, keep in mind that the average reading time for content is around 11 minutes, allowing you to engage deeply with the material.
Common Mistakes to Avoid in Marker Rendering
To enhance your marker illustration skills, it is essential to stay alert to these typical traps:
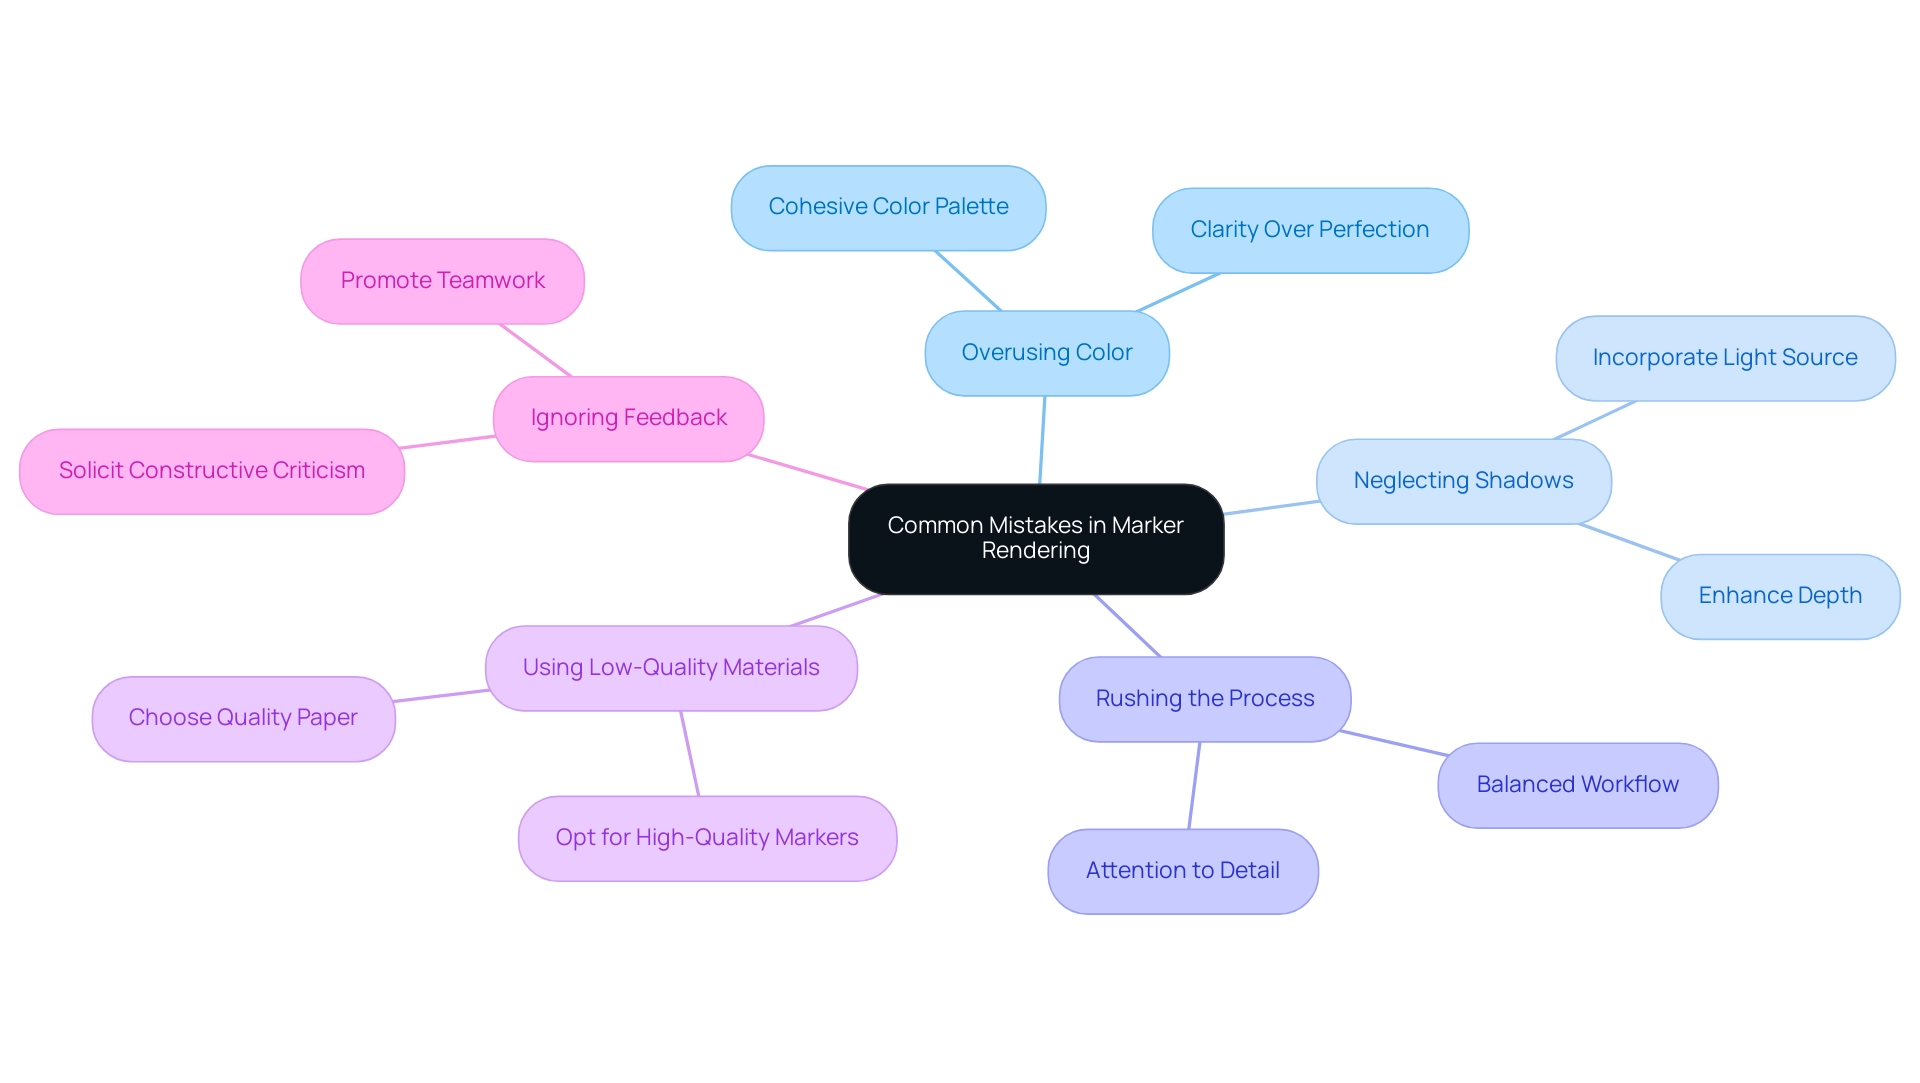
- Overusing Color: Excessive color variation can lead to visual chaos, detracting from the clarity of your work. As Paul Keskeys, Editor in Chief at Architizer, emphasizes, if a diagram, sketch, or physical model can communicate your design better than a polished visual, clarity should take precedence over visual perfection. Adhere to a cohesive color palette that complements your overall vision.
- Neglecting Shadows: The absence of shadows can result in a flat appearance, undermining the three-dimensionality of your depiction. Always account for the light source, incorporating appropriate shadowing to enhance depth.
- Rushing the Process: Each phase of your visualization deserves attention and care. Hurrying through steps can lead to oversights and diminished detail, ultimately compromising the quality of your work. The case study ‘Rendering Overload: Balancing Quality and Efficiency’ highlights the importance of avoiding rendering overload by balancing high-quality visuals with efficient time management.
- Using Low-Quality Materials: The choice of materials significantly impacts the final output. Opt for high-quality markers and paper, as inferior products can diminish the visual appeal of your renderings.
- Ignoring Feedback: Actively solicit input from peers or mentors. Constructive criticism is invaluable, offering insights that can illuminate areas for growth and refinement in your technique. Feedback promotes teamwork and is crucial for attaining the accuracy and detail required to align your work with the client’s vision and expectations.
Moreover, investing in high-quality visualizations acts as a window into the future of your project, enabling all stakeholders to connect with the potential of your creations. For clarity in your renderings, consider raising the camera to 25 or 30 feet. By addressing these common mistakes and incorporating these insights, you can enhance the relatability and constructibility of your architectural creations, ensuring they resonate with both clients and stakeholders.
This focus on precision and detail not only captures the essence of your design but also plays a critical role in effective decision-making throughout the project development process.
Conclusion
Mastering marker rendering is essential for architects aiming to communicate their design visions effectively and engagingly. The article outlines the significance of this technique, emphasizing its ability to transform static floor plans into dynamic visual narratives. By understanding the fundamental principles, essential tools, and innovative techniques, architects can elevate their visualizations, ensuring clarity and precision in their presentations.
The discussion of tools, such as high-quality markers and bleed-resistant paper, highlights how investment in quality can enhance the overall output. Additionally, the step-by-step guide provided offers a practical framework for creating compelling renderings, while the techniques for adding textures and details enrich the realism of architectural representations. Awareness of common mistakes to avoid further reinforces the necessity of diligence and attention to detail in the rendering process.
In conclusion, as the architectural landscape evolves with the integration of advanced rendering technologies, the importance of marker rendering remains paramount. By honing these skills, architects not only enhance their ability to convey design intent but also foster stronger connections with clients and stakeholders. Ultimately, the pursuit of excellence in architectural visualization through marker rendering will contribute to more confident project presentations and successful outcomes in a competitive market.

0 Comments