Introduction
Architectural rendering in Photoshop is a sophisticated endeavor that demands meticulous attention to detail and a mastery of various techniques. As the landscape of architectural visualization evolves, professionals are tasked with not only creating visually stunning representations but also ensuring that these renderings communicate their design intent effectively.
This article delves into essential methods for enhancing architectural plans, including:
- Adept layer management
- Photorealistic material creation
- Strategic use of shadows and textures
By exploring advanced workflow strategies and community resources, architects can refine their skills, streamline their processes, and ultimately elevate their visual storytelling capabilities. The journey through these techniques reveals the intricate dance between artistry and precision, essential for captivating clients and stakeholders alike.
Essential Techniques for Architectural Plan Rendering in Photoshop
Initiating architectural plan rendering in Photoshop requires a solid understanding of several key techniques that emphasize precision and detail:
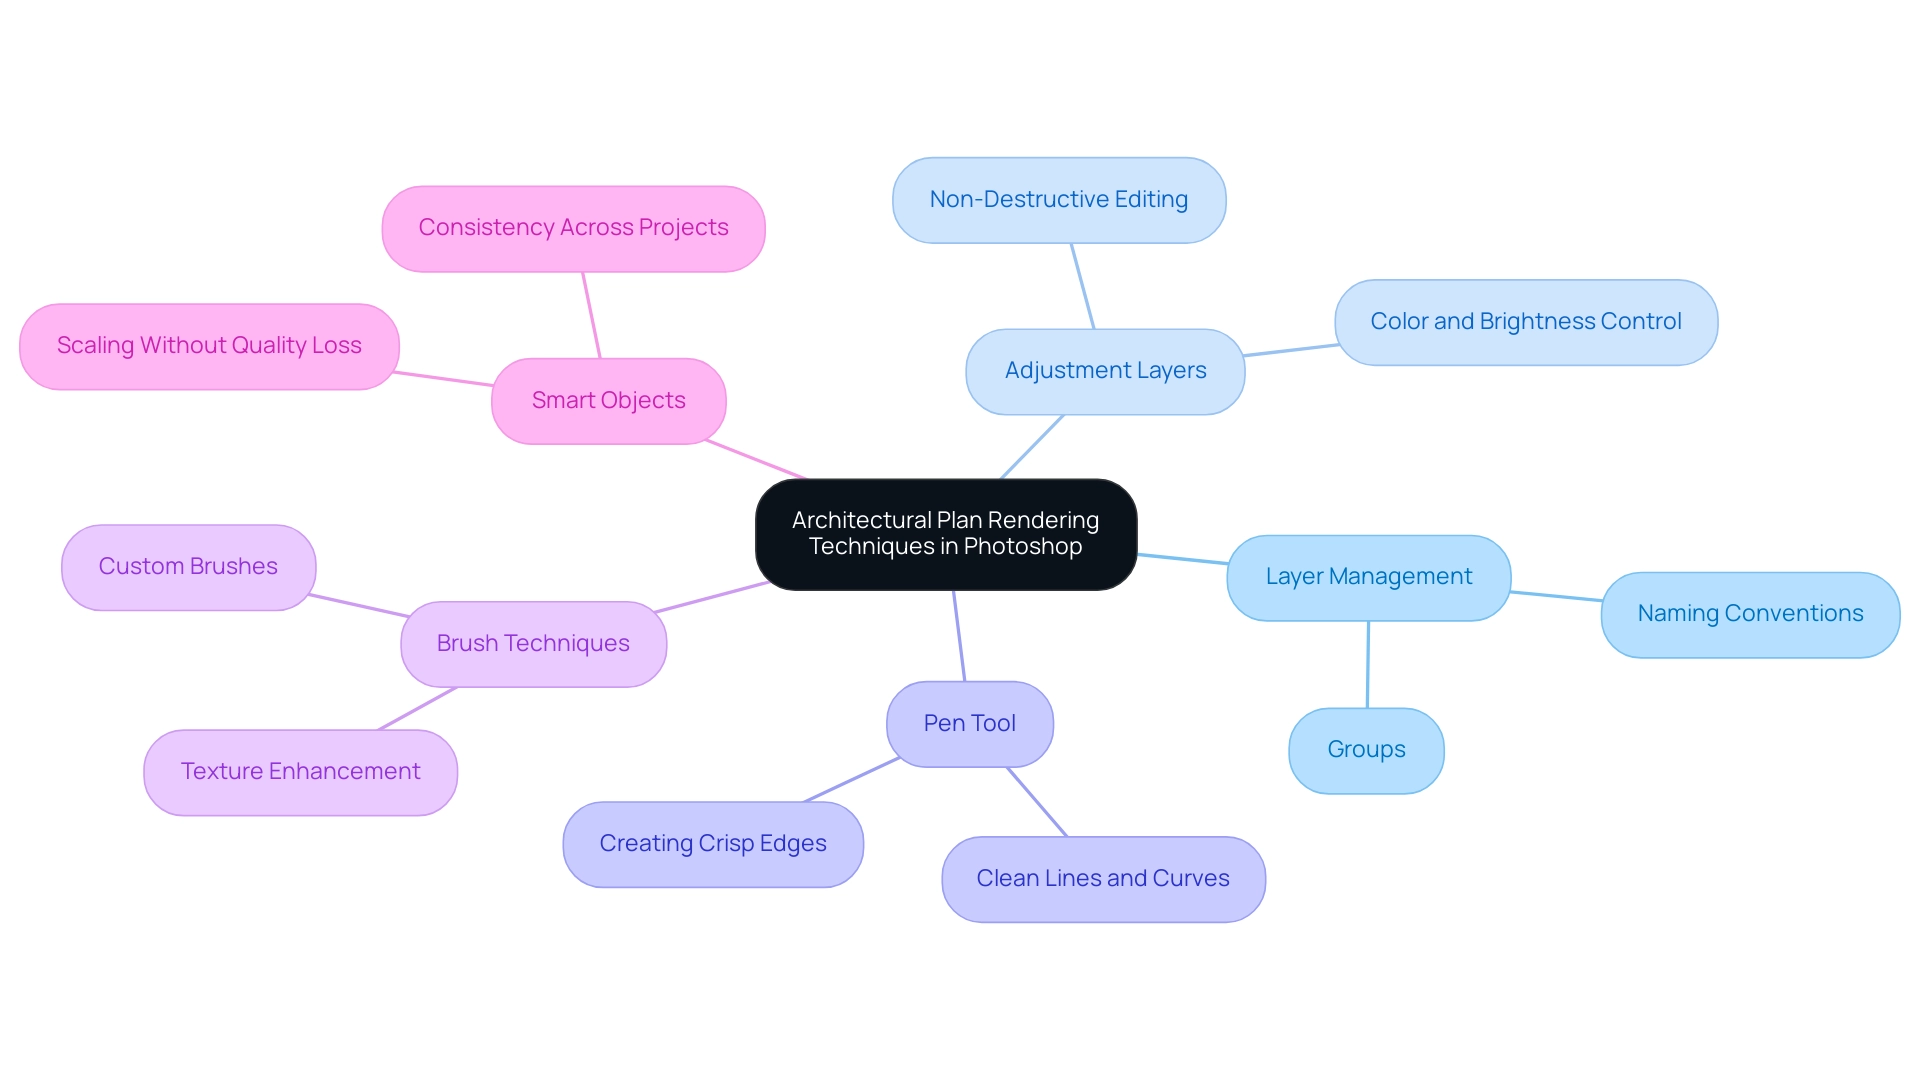
Layer Management: Effective organization of layers is paramount. Separate various creative elements by utilizing groups and consistent naming conventions to maintain an orderly workspace, which enhances clarity and efficiency. In the context of 3D external visuals, mastering layer management is essential for accurately capturing the essence of your creation, helping stakeholders envision the final product more effectively.
Adjustment Layers: Implement adjustment layers to alter colors, brightness, and contrast while preserving the integrity of the original image. This non-destructive method facilitates revisions and fosters creativity without compromising quality, ensuring that the critical details that tell your design’s story remain intact.
Pen Tool for Precise Edges: The Pen Tool is indispensable for creating crisp edges in your renderings. Mastering this tool allows for the production of clean lines and curves, essential for achieving a high level of professional quality in design presentations, ultimately enhancing communication with builders and other stakeholders.
Brush Techniques: Custom brushes can significantly enhance your plans by adding distinctive textures and intricate details. Experimenting with brush settings can elevate the visual appeal of your creations, making them stand out and effectively communicating the architectural vision.
Smart Objects: Convert commonly used elements into Smart Objects. This practice allows scaling and editing without quality loss, streamlining your workflow and ensuring consistency across your project, which is essential for maintaining clarity in your creations.
The significance of small details cannot be emphasized enough; they enhance depth and narrative in your design, enabling a captivating story to develop in your visuals. Furthermore, 3D townhome visualization acts as a powerful narrative tool for developers, providing clarity and certainty that enhances communication with builders, lenders, and municipalities.
In the words of Curved Axis, “It’s no doubt impressive but we’re safe for now,” highlighting the ongoing evolution of visualization techniques. Moreover, the case study named ‘Writing MAXScript with ChatGPT’ demonstrates how AI can help architects in overcoming scripting challenges, thereby improving their visualization processes. By mastering these techniques, architects can significantly enhance the quality and efficiency of their architectural plan rendering in Photoshop, ensuring that they align with the latest advancements while effectively conveying their design visions.
Creating Photorealistic Materials and Lighting Effects
Creating photorealistic materials and lighting effects is essential for architectural plan rendering in Photoshop, requiring a meticulous approach that emphasizes both material properties and lighting dynamics, crucial for engaging a passionate partner in 3D visualization. Intricate details not only enhance realism but also evoke an emotional connection, making projects feel real and lived-in for homeowners and businesses. Consider the following techniques:
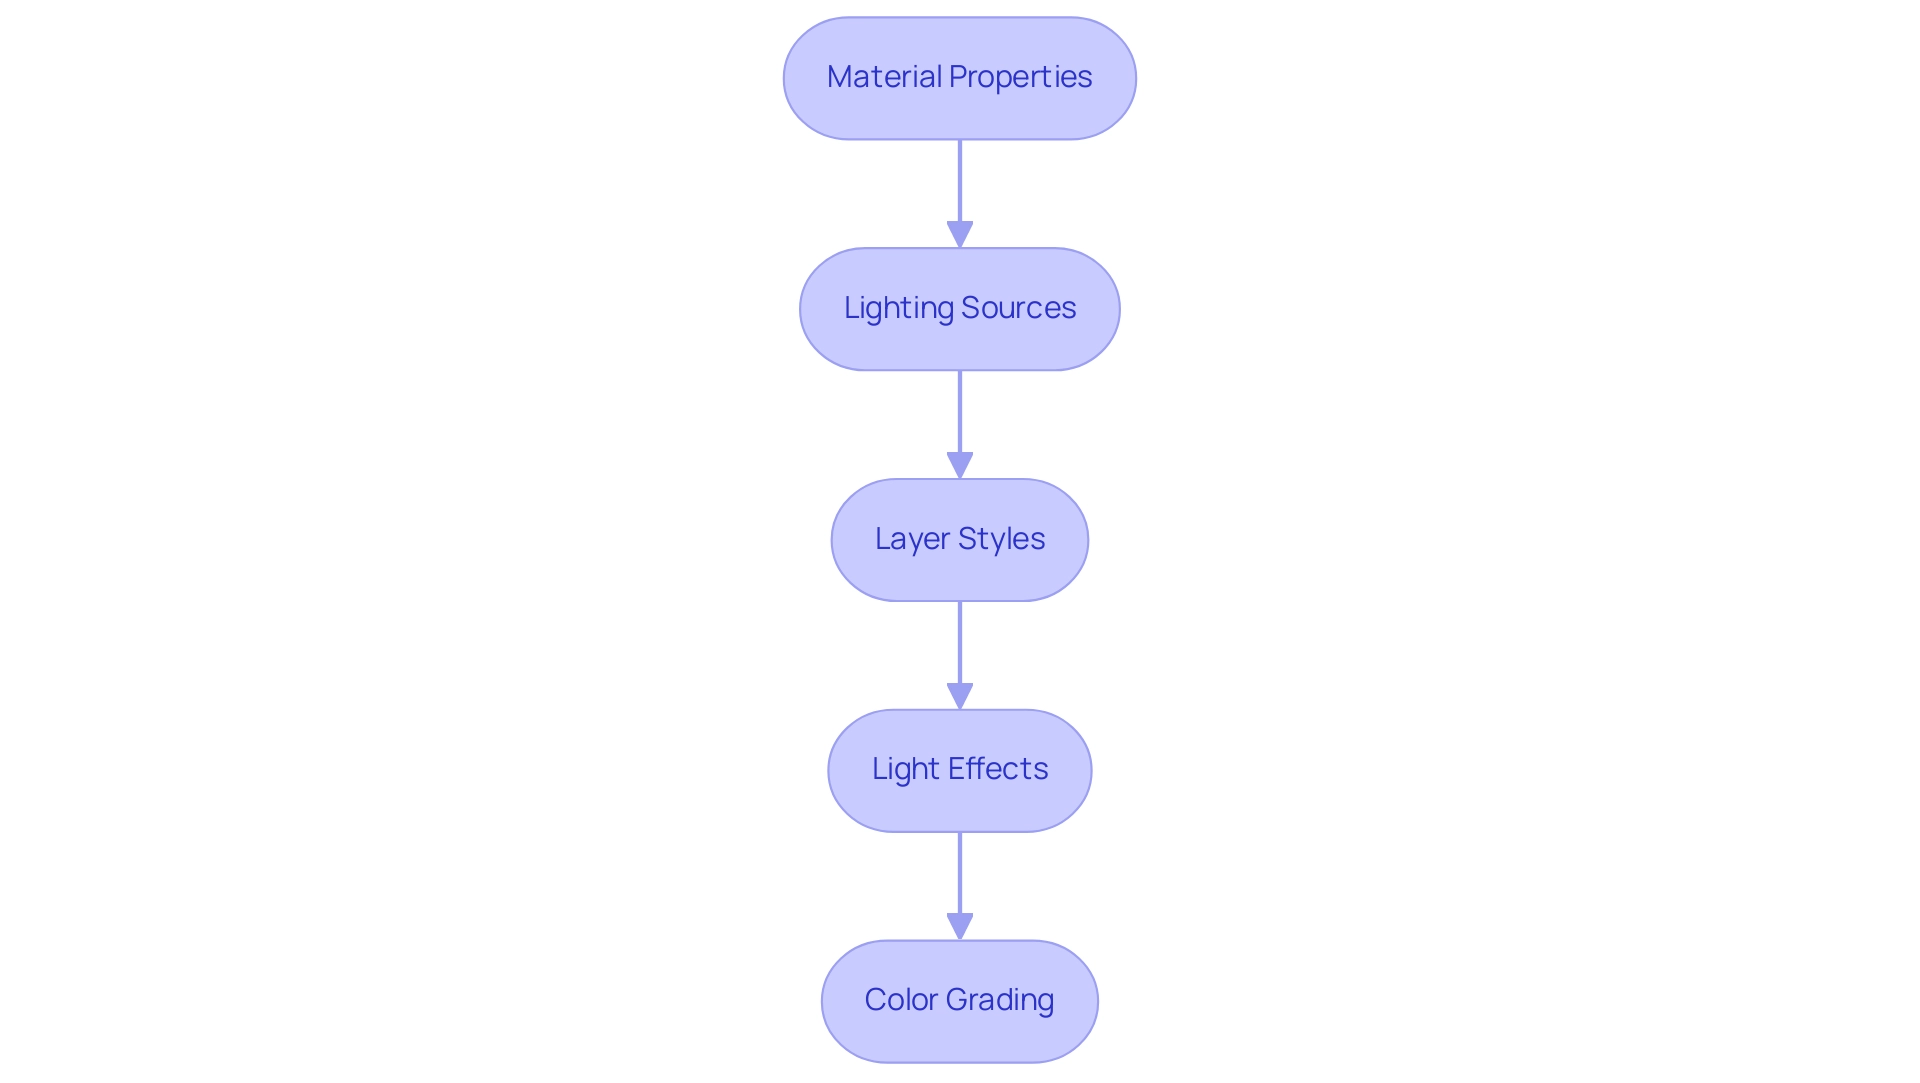
Material Properties: A profound understanding of the intrinsic properties of various materials—such as glossiness and reflectivity—is essential. High-resolution textures should be utilized to enhance realism, ensuring that each surface interacts with light in a way that mimics its real-world counterpart. The application of detailed bump maps can further add to the depth and authenticity of materials in architectural plan rendering in Photoshop, significantly enhancing the emotional impact of your designs.
Lighting Sources: The integration of multiple light sources is critical for replicating both natural and artificial illumination conditions. Experimenting with ambient light alongside directional sources can create a sense of depth and dimensionality that is crucial in architectural plan rendering in Photoshop, which improves stakeholder communication and enhances client understanding.
Layer Styles: Employing layer styles, such as Bevel and Emboss, can significantly enhance the perceived dimensionality of surfaces. This technique not only adds depth but also aids in making materials appear more tangible, which enhances the overall photorealism of the architectural plan rendering in Photoshop.
Light Effects: The use of lens flares and specialized lighting effects can simulate reflections and highlights, contributing to a more immersive and realistic atmosphere. Careful calibration of these effects is crucial to avoid overexposure, ensuring a believable representation of light interaction in architectural plan rendering in Photoshop.
Color Grading: After processing, applying color grading techniques can unify the visual elements of the composition. This process improves the overall aesthetic, enabling a consistent color palette that aligns with the design vision and enhances the photorealistic quality of the final image.
Incorporating advanced techniques is essential, especially considering that the average subdivision value that works best with global illumination and lighting is 32, highlighting the need for precision in architectural plan rendering in Photoshop. Furthermore, the North American market captured a 34% share in 2023, showcasing the robust technological infrastructure and high adoption rates of advanced visualization technologies across various industries, including architecture. Acknowledging the impact of major participants in the 3D visualization market, like NVIDIA and Adobe, offers important perspectives on the tools and technologies influencing the future of visual representation, essential for creating detailed 3D visuals for client assessment and creative exploration.
Utilizing Shadows and Textures for Enhanced Realism
To achieve enhanced realism in your architectural renderings through the effective use of shadows and textures, adhere to the following guidelines:
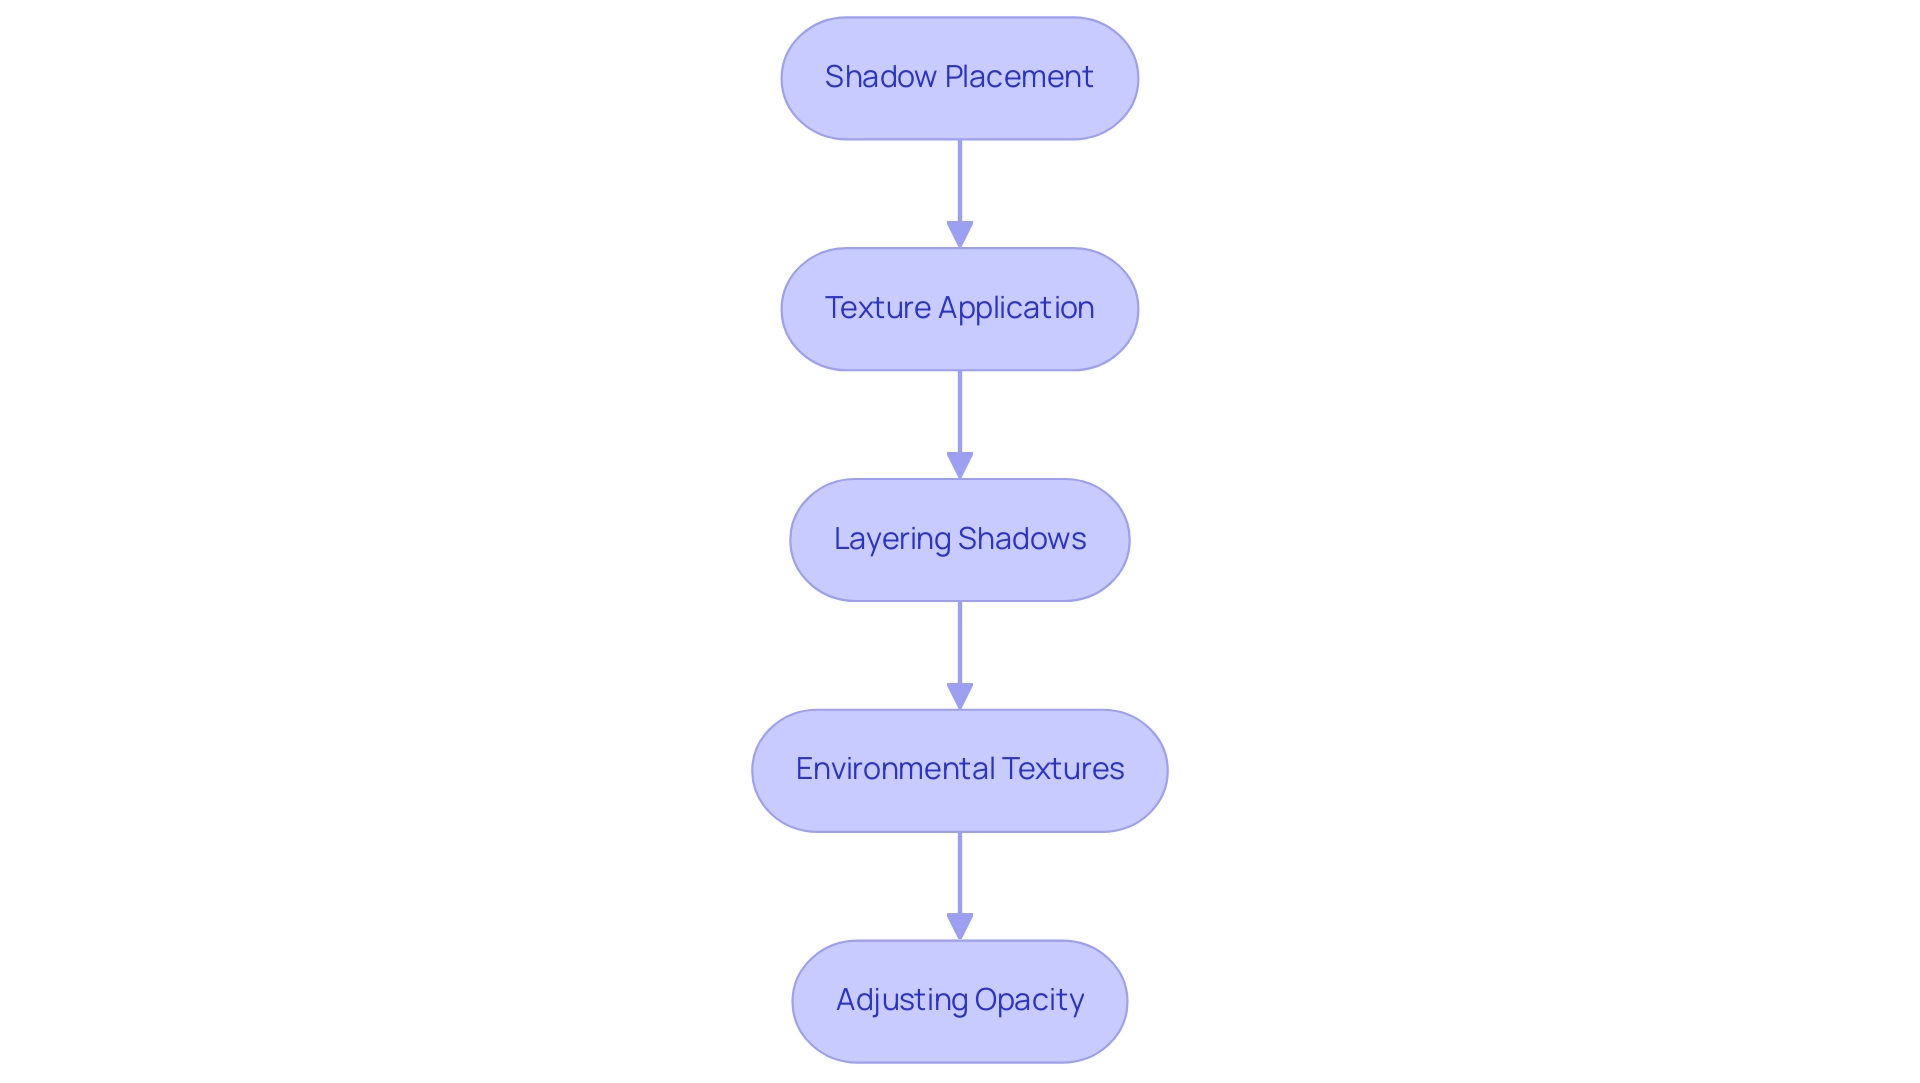
Shadow Placement: Begin by closely analyzing the light source within your scene. This assessment will enable you to accurately determine the angle and length of shadows. Employ soft brushes to create gradients that mimic natural shadows, adding depth and dimension to your render. The significance of precision in this step is paramount; as highlighted in our case studies, effective shadow casting is crucial for conveying the essence and enhancing visual storytelling in architectural plan rendering in Photoshop, ultimately capturing the soul of your creation.
Texture Application: Texturing is critical for adding detail; apply textures to surfaces such as walls, floors, and furniture. Utilize blending modes to ensure that textures integrate seamlessly, enhancing the realism of your composition without disrupting the overall aesthetic. The successful application of textures in projects such as SUNDIAL, which earned +22 points in Buildner University Rankings, demonstrates how intricate visuals, especially through architectural plan rendering in Photoshop, can enhance architectural aesthetics and result in greater client satisfaction and marketing efficiency.
Layering Shadows: Implement multiple layers for shadows, adjusting their opacity to achieve a naturalistic effect. This technique offers the flexibility to fine-tune shadow characteristics while maintaining the integrity of the concept, which is crucial in captivating your audience and building confidence in your project.
Environmental Textures: Incorporate textures that reflect the surrounding environment—grass, pavement, or wood—into your renderings. These textures used in architectural plan rendering in Photoshop ground your design in reality, providing context that enhances viewer relatability and engagement. Such aspects are instrumental in pre-sales visualization, especially through architectural plan rendering in Photoshop, as they help potential investors envision the project before its physical manifestation.
Adjusting Opacity: Carefully modify the opacity of your shadow layers to ensure a believable representation. Shadows should complement the scene rather than dominate it, striking a balance that contributes to the overall realism of the rendering. As Oscar Barajas Bga highlights, “We strongly believe in the significance of exploring new boundaries in creation and construction,” emphasizing the innovative capability of using shadows and textures effectively while reinforcing the narrative of precision and intricacy.
By applying these techniques, architects can utilize architectural plan rendering in Photoshop to create compelling visual narratives that resonate with viewers, showcasing their innovative creations in an authentic context. Remember, the magic lies in the minutiae, as these small elements cumulatively tell a powerful narrative of your creative vision.
Streamlining Your Workflow for Efficient Rendering
To enhance your architectural visualization process in Photoshop while ensuring accuracy and intricacy in your creations, consider implementing the following advanced strategies:
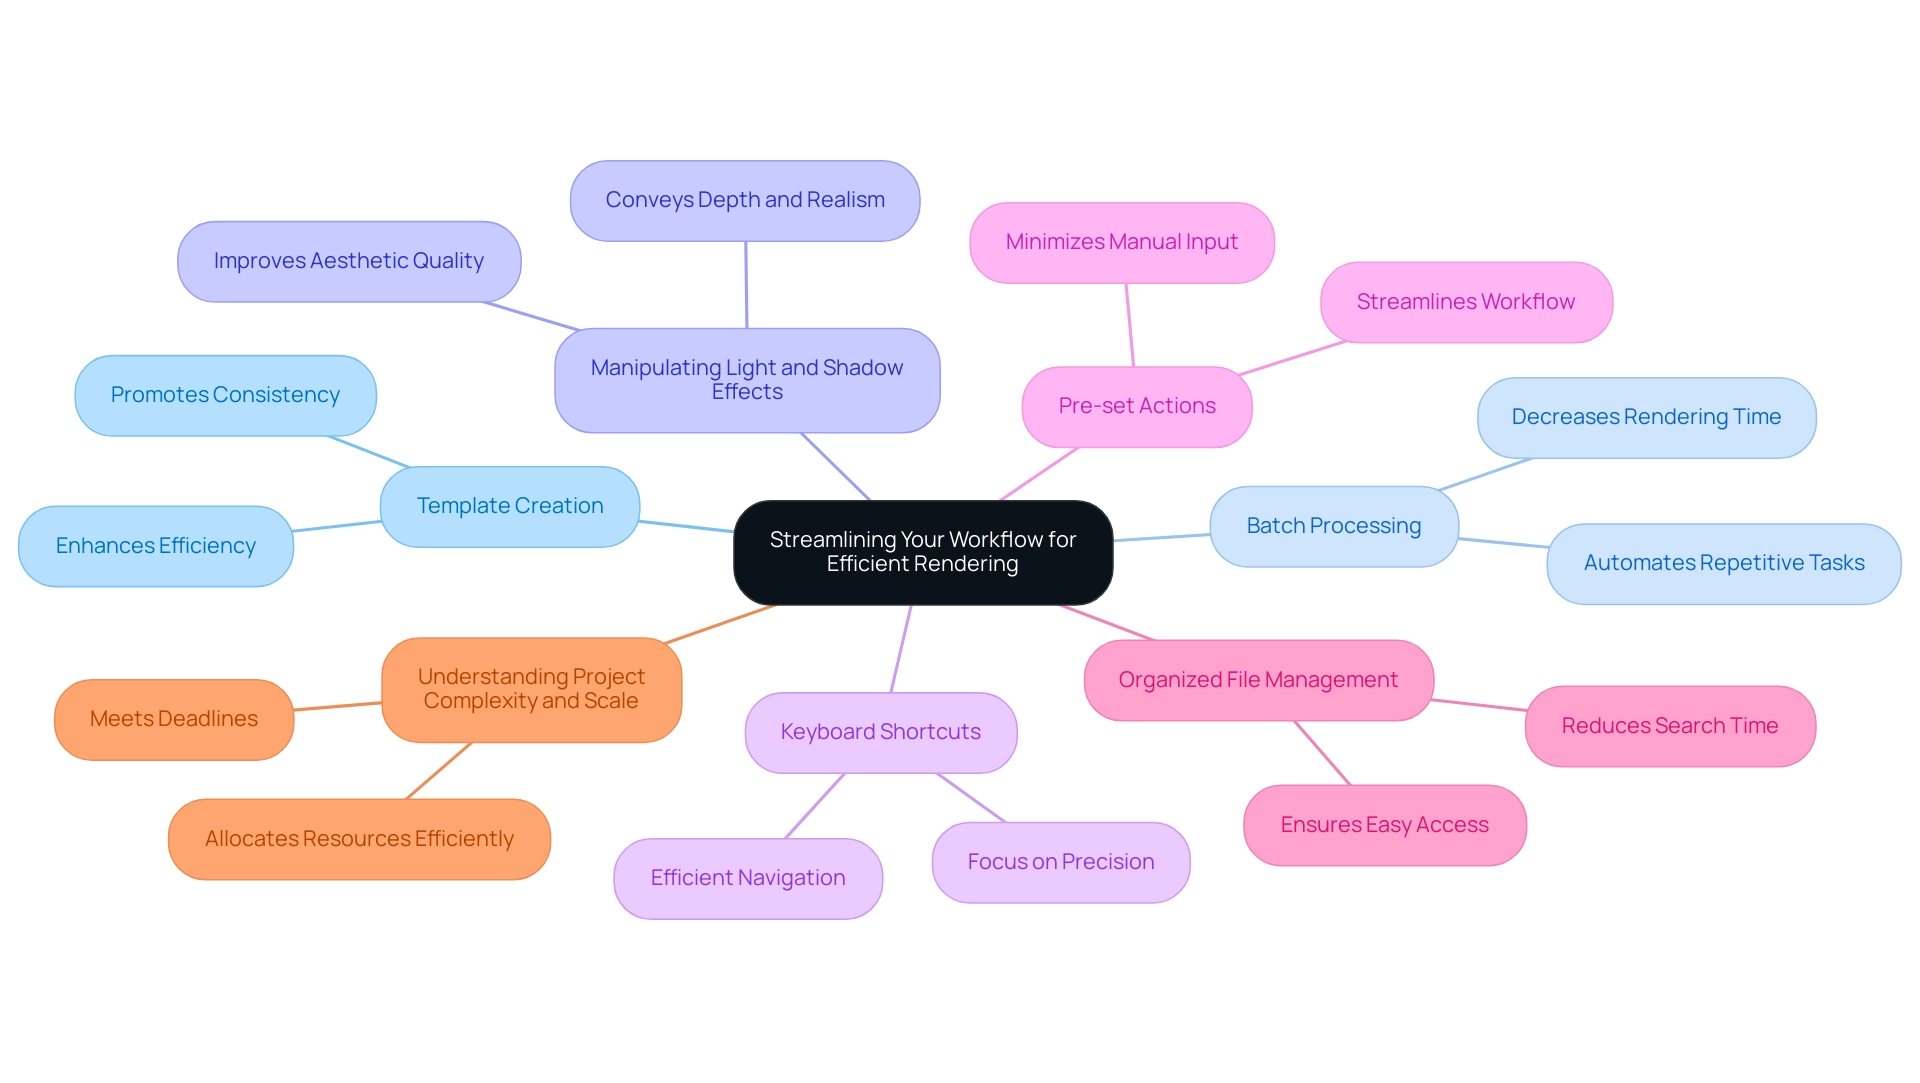
Template Creation: Establishing templates for recurring project types not only enhances efficiency but also ensures that every aspect captures the essence of your creation. This approach reduces setup time and promotes consistency, allowing your projects to reflect a professional standard.
Batch Processing: Leverage batch processing to automate repetitive tasks, applying adjustments or exporting multiple files simultaneously. By decreasing rendering time in architectural plan rendering in Photoshop, you can devote more focus to the complex aspects that infuse vitality into your designs, enhancing their emotional effect and narrative potential.
Manipulating Light and Shadow Effects: The effective manipulation of light and shadow in your elevations is crucial. This technique improves the aesthetic quality of your architectural structures and conveys depth and realism, especially in architectural plan rendering in Photoshop, highlighting the careful elements that narrate the story of your design.
Keyboard Shortcuts: Mastering Photoshop’s keyboard shortcuts is essential for efficient navigation. This proficiency allows you to execute commands swiftly, maintaining a focus on precision and detail in your architectural plan rendering in Photoshop.
Pre-set Actions: Create pre-set actions for routine tasks, enabling you to execute complex sequences of commands with a single click. This streamlining of workflow minimizes manual input, allowing more time for thoughtful customization and revisions based on client feedback.
Organized File Management: A well-structured file management system for project assets is crucial. Keeping resources organized ensures easy access and reduces time spent searching for files, allowing for a more fluid workflow aligned with client specifications.
Understanding Project Complexity and Scale: Recognize that the more complex your project, the more time and resources your architectural plan rendering in Photoshop will require. Factors like the size of the property and the complexity of elements must be taken into account to allocate resources efficiently and meet deadlines.
By adopting these strategies, architects can balance creativity with technical skill, ultimately resulting in a more productive work environment. As noted in a recent case study, integrating artistry with technical expertise is essential for achieving design excellence. Remember, every detail contributes to the narrative of your project, reinforcing the importance of collaboration and client engagement throughout the rendering process.
Resources and Communities for Architectural Rendering Enthusiasts
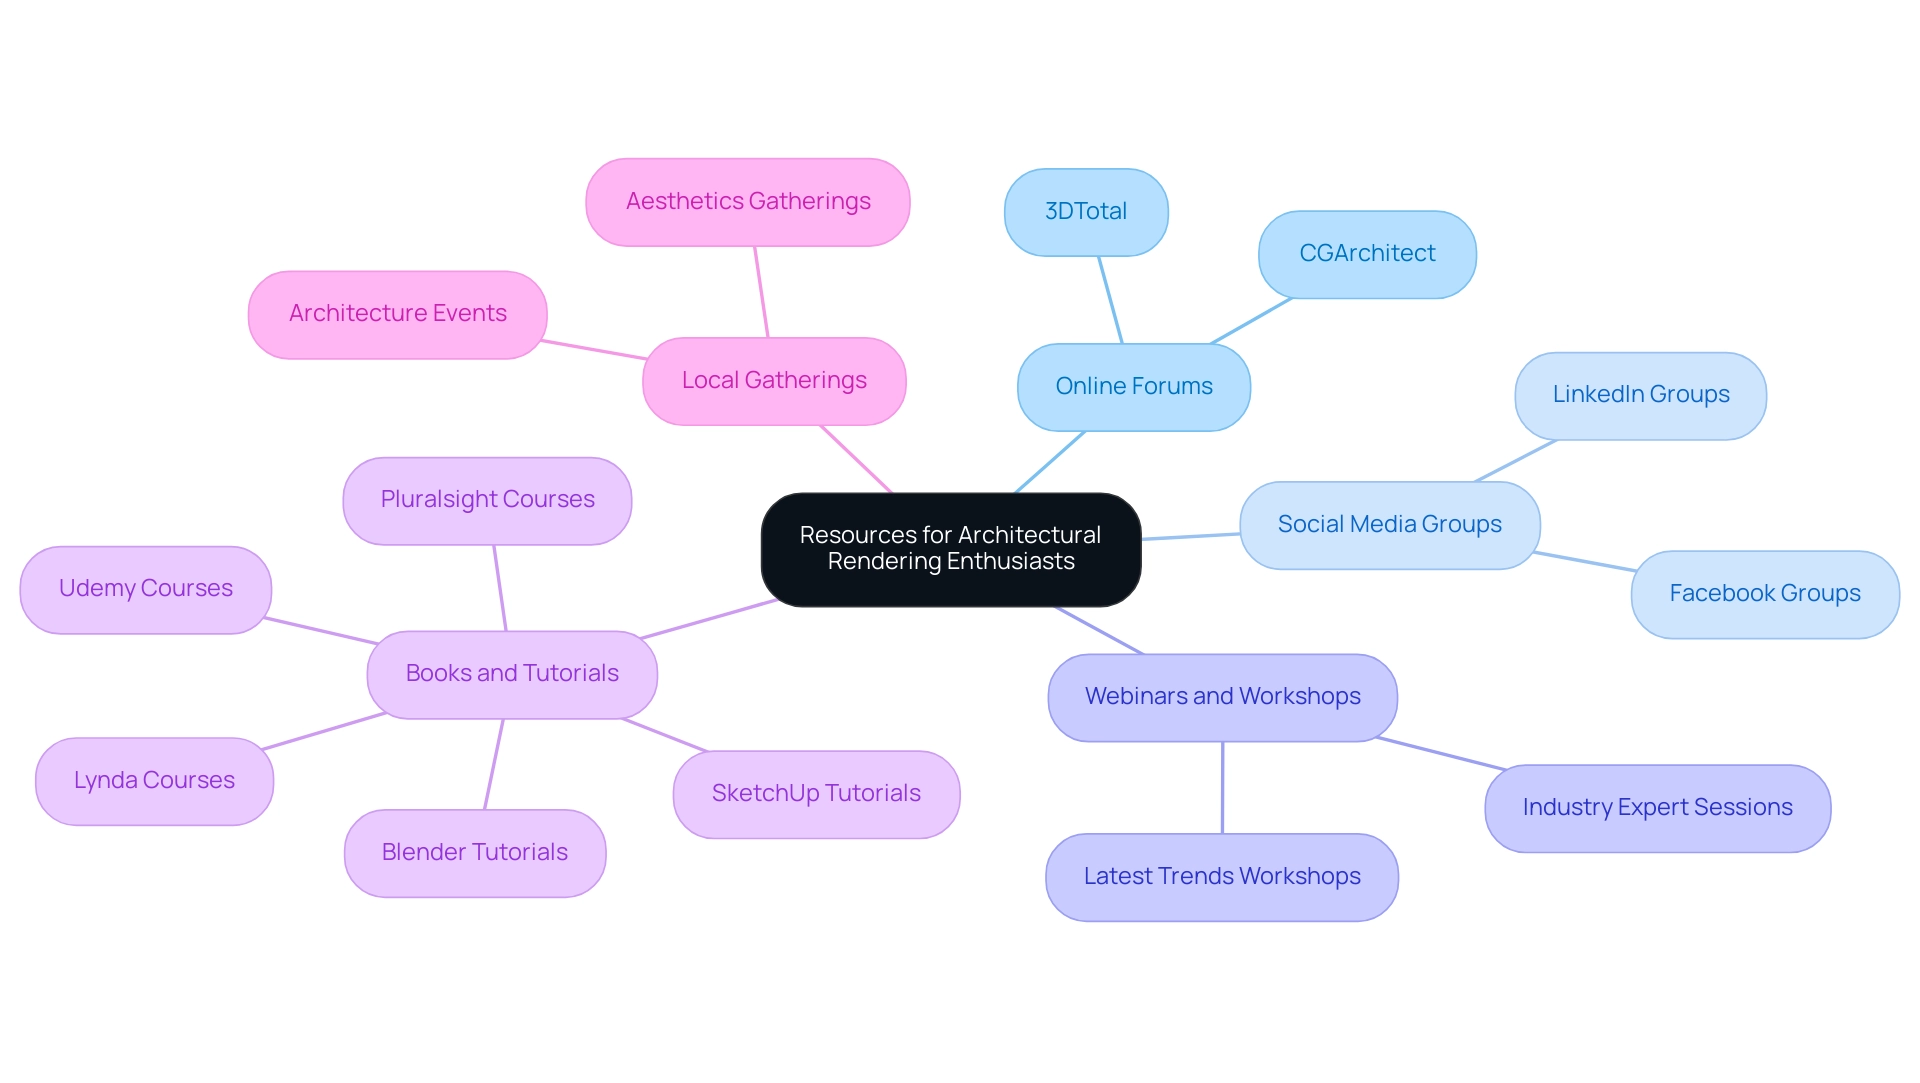
To foster continuous learning and enhance community engagement in architectural visualization, professionals are encouraged to explore the following resources:
- Online Forums: Engage in recognized visualization forums like CGArchitect and 3DTotal. These platforms facilitate the sharing of tips, critiques, and project showcases among industry peers, promoting a collaborative environment.
- Social Media Groups: Participate in specialized Facebook and LinkedIn groups focused on architectural visualization. These groups serve as valuable networks for knowledge exchange and fostering relationships with fellow professionals.
- Webinars and Workshops: Attend webinars and workshops led by industry experts to remain informed about the latest trends and advancements in visualization techniques, especially as the demand for skilled technicians in VR and AR continues to rise.
- Books and Tutorials: Delve into comprehensive books and online tutorials that explore advanced visualization techniques and Photoshop skills, thereby refining your technical expertise. Resources like Blender and SketchUp tutorials are particularly beneficial for understanding intricate details in design renderings that enhance realism and emotional impact. Additionally, platforms like Lynda, Udemy, and Pluralsight offer affordable courses that can significantly boost your skills.
- Local Gatherings: Join local events related to architecture or aesthetics. These gatherings provide opportunities to build connections and collaborate on projects with other like-minded professionals.
A compelling example of user interaction and community involvement in building is the Crossrail Place Roof Garden, a 10,000-square-meter elevated green park in Canary Wharf. This case study showcases how participants utilized VR technology to navigate the space, adding or removing design elements in real-time, which highlights the effectiveness of collaborative platforms in enhancing creativity and engaging clients in the design process.
As the market for design rendering is projected to grow significantly, reaching $16.18 billion by 2032 with a CAGR of 17.0%, leveraging these resources becomes increasingly vital for maintaining a competitive edge. Tim Heath emphasizes this necessity, stating, “Enhancing Public Engagement in Architectural Design: A Comparative Analysis of Advanced Virtual Reality Approaches in Building Information Modeling and Gamification Techniques.” Engaging actively in these communities not only sharpens skills but also fosters networking, which is essential for success in the field of architectural visualization.
Conclusion
Mastering architectural rendering in Photoshop is an intricate process that requires a deep understanding of various techniques that enhance both precision and visual storytelling. The importance of effective layer management cannot be understated, as it lays the foundation for organized and efficient workflows. By employing adjustment layers, architects can maintain the integrity of their original designs while allowing for creative revisions, thus preserving the narrative quality of their work.
Furthermore, the creation of photorealistic materials and the strategic use of lighting effects serve to elevate the emotional connection between the viewer and the architectural vision. Understanding material properties and experimenting with light sources are essential for achieving the desired realism that captivates clients and stakeholders alike. The careful application of shadows and textures adds depth and dimension, reinforcing the design’s essence and enhancing its overall impact.
Streamlining workflow through techniques such as template creation and batch processing not only improves efficiency but also allows architects to focus on the finer details that breathe life into their renderings. Coupled with an organized file management system and mastery of keyboard shortcuts, these strategies ensure a productive environment conducive to creativity.
Lastly, engaging with resources and communities dedicated to architectural rendering fosters continuous learning and professional growth. By participating in forums, attending webinars, and collaborating with peers, architects can stay abreast of the latest advancements and trends in the field. As the architectural visualization market continues to grow, leveraging these insights and techniques will be vital in crafting compelling visual narratives that resonate with clients and elevate the standards of architectural presentations.

0 Comments