The process of creating a realistic render is quite complicated with many steps and tricks. To create a visualization that really sells the concept and does the project justice, you’ll need to get a lot of things right.
Of course, while it’s recommended that you hire a visualization company, there’s still merit in discussing the process behind creating hyper-realistic renderings. When creating a render, you’ll likely come up against a few issues and a few quirks that you’ll have to get right. Perhaps one of the most common hurdles when creating a 3D render is getting the lighting right.
Even if you create an impeccable 3D model, the render won’t have the effect it’s supposed to without proper lighting. Lighting in renders is crucial for making them look good and as realistic as possible. But what are some tips for getting the lighting right on a 3D rendering?
Mind the Composition
The first thing that any good design expert will do is to consider the overall composition. The composition is what often dictates what type of lighting would be required, making it easier to decide. For example, for a render that features a park filled with flowers in beautiful bloom, going with stronger lighting is better, as it will imitate a nice, sunny day. In contrast, a render of a cozy cottage with a fireplace would fare better with muted lighting.

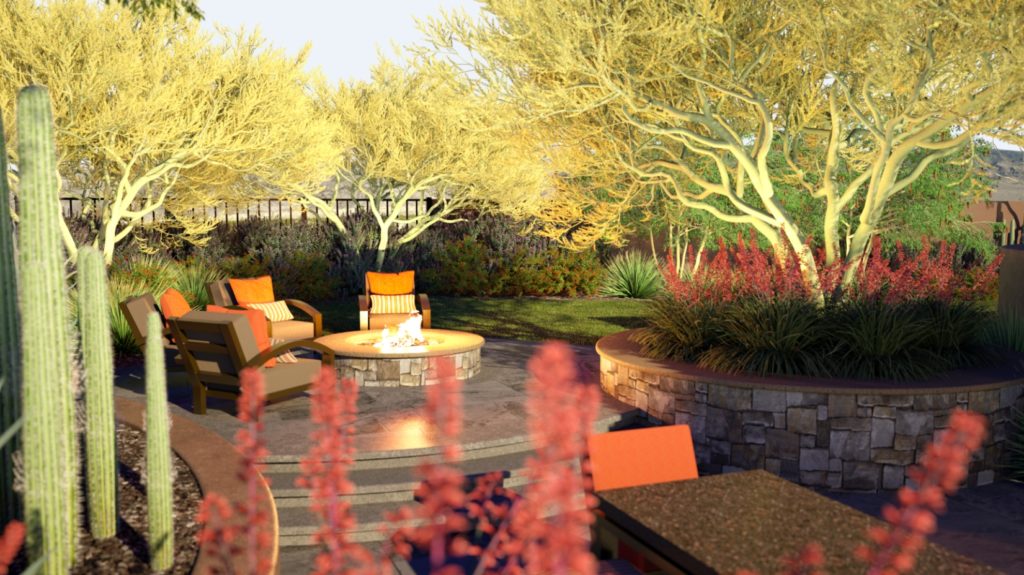
The proper use of lighting in a 3D render is important, as seen here.
Lighting is something that’s usually considered near the end of your rendering. But an experienced 3D rendering technician will start with this. Where will shadows fall relative to my camera location? Light and shadow are often forgotten but important components of the composition.
What mood do I want? Many clients default to the typical sunny afternoon rendering, but an evening shot or overcast lighting after rain can be quite moving. If you start with these thoughts in mind at the beginning, they will help you to light and frame the shot. Each piece is complemented with a different type and strength of lighting, which means that considering the composition of the lighting is one of the first things that should be done.
Lighting Position
The position of your light source will dictate just about everything in your render, including the direction of the light, the angle of shadows, which areas get highlighted, and many other very crucial features. Thinking of the position for your light source is one thing that should be done to complete your piece.
The position of the lighting in your render will help dictate the entire atmosphere, and it has the powerful effect of playing around with the subjects within your composition. As an example, nighttime renders often will have moonlight or a streetlamp as the primary source of light. This light will illuminate only a specific area of the render. Natural light is much stronger when it comes to the location that it highlights.
Lighting Color and Dispersion
Choosing color tints also will depend on the position and the direction of your light source. Sunrise and sunset renderings usually have a powerful orange tint, whereas daytime renderings usually feature a yellow hue. The different tints and hues add a subtle yet powerful shift of emotion and perception for rendering, which is why they should be chosen wisely.
You should also investigate the way light spreads. The real world is not illuminated by a single white spotlight. The sun, moon, or artificial key light are typically the primary light source, and they need to be colored properly. But that primary light is also dispersed throughout the scene.
Most notably, in outside shots, the light of the sun is filtered through the atmosphere resulting in an effect called “global illumination”. You already know about this. You call it the sky, and this filtering is what makes it blue. That light scatters all around your scene and allows you to see under trees and other things shaded from the sun.

Carefully dispersing your colors creates a realistic and impressive rendering.
The primary light source and the atmospheric light are both strong enough that they bounce multiple times before they reach the eye. So, in addition to seeing a yellow cast on buildings from the sun, and shadows having a blue cast from the sky, you can also notice the influence of green grass affecting light striking objects near the ground.
To see this for yourself, place a large red object near a white wall and notice the slight red influence of that object on the nearest portions of the wall. In the real world, there are countless such influences. So, a large part of creating a realistic-looking 3D rendering will come down to accurately recreating that lighting.
There are two ways to achieve this realistic lighting (which we often call physical lighting). The first is to endeavor to model not only your subject scene but also everything out of view of the camera which has an impact on your scene. This is an unrealistic goal! The second option is to simulate this. All professional render engines have physical light sources such as sun and sky with a variety of settings to fine-tune them to your needs.
Such render engines also support virtual lights which can emulate commercially available light sources and fixtures via IES profiles that many manufacturers provide. Lastly, you should look into the option of high-dynamic range (HDR) images. These HDR light sources look somewhat like photographs, but they are quite different. Rather than an image for you to look at, these actually light up your scene. Think of each pixel as a tiny spotlight emitting a specific color at the proper intensity to recreate a real-world scenario. This HDR image is typically wrapped around a sphere in order to light your scene from all directions.
Highlight Your Important Areas
No matter the type of lighting that you choose, it will achieve the same goal of highlighting specific areas in the 3D rendering, making the entire piece much more dimensional. However, each type of lighting is different, which means that light source positioning can determine what areas will get highlighted in your rendering.
Thankfully, any good artist will be able to manipulate the lighting to achieve the exact results needed. This allows for the ability to use the type of lighting that will highlight the essential areas in your render, bringing them to the focal point. Consider this sort of like using a certain shade of makeup to highlight the colors in your eyes.
For extra real-world lighting bonus points, make sure that the power of your natural lighting is properly balanced with your artificial light sources, and make sure that you have the angle of the sunset correctly for the latitude and longitude of the location, the date, and the time of day.
Look At References
All artists need a little help from time to time, including those who create amazing 3D renderings. Nobody has created a perfect 3D rendering on their first try, and mastering lighting is a demanding and trying process that even the best of specialists will have to work on. Because of this, using reference images is oftentimes a saving grace.
Thankfully, the internet is full of incredible photos, portfolios, renders, and everything in between. These are great for comparing and learning, much like an artist may learn how to draw flowers by looking at flowers. The more you study your subject, the better you’ll get.
Subtly Use Light Spill
Nearly every artist is interested in experimenting will light spill for their renderings. Light spill can transform the mood and aura of a composition, but it needs to be used carefully. There is such a thing as too much of a good thing, and this is a good example.
It’s best to use light spill subtly, so your sunbeams shouldn’t be harsh but rather should feature a soft spill that creates a more natural and realistic look. Also, learning just what the light spills illuminate and what they cast shadows to in your render can also help to dictate the position and the angle of both the spill and the primary source of light. Render engines sometimes use settings like “sun size” and light falloff to control these properties.
Mastering how you light up a rendering won’t happen overnight, and many specialists take years to get it right. It’s an easy thing to overlook, but it can be one of the most crucial things to figure out when striving for realism. When an architect receives a completed render, few people realize that there was a long process to get there that requires a lot of hours of highly detailed and skilled work. Light is crucial and can easily change the way a rendering is perceived.
Are you looking for perfectly illuminated renderings? Contact J Scott Smith Visual Designs today for information on how we can help light up your world.

0 Comments